OSD menu by signageOS
To make provisioning, deployments and even development more straightforward, signageOS introduces the OSD menu (On Screen Display).
signageOS OSD allows you on any supported device to:
- configure LAN network connection
- connect the device to the WiFi network
- install signageOS Core App with built-in Applet
- Change the device's settings
- enable or disable Kiosk mode
- enable or disable Auto recovery
- troubleshoot device connectivity and network speed
How to access the OSD
To access the OSD menu follow these steps:
-
Try with remote control or in case the device doesn't contain it, plug the keyboard to the display or device
-
find the PIN - either on the display in the bottom right corner or in Box
-
Press the PIN on the keyboard or remote followed by ENTER
-
OSD menu will show up

OSD navigation
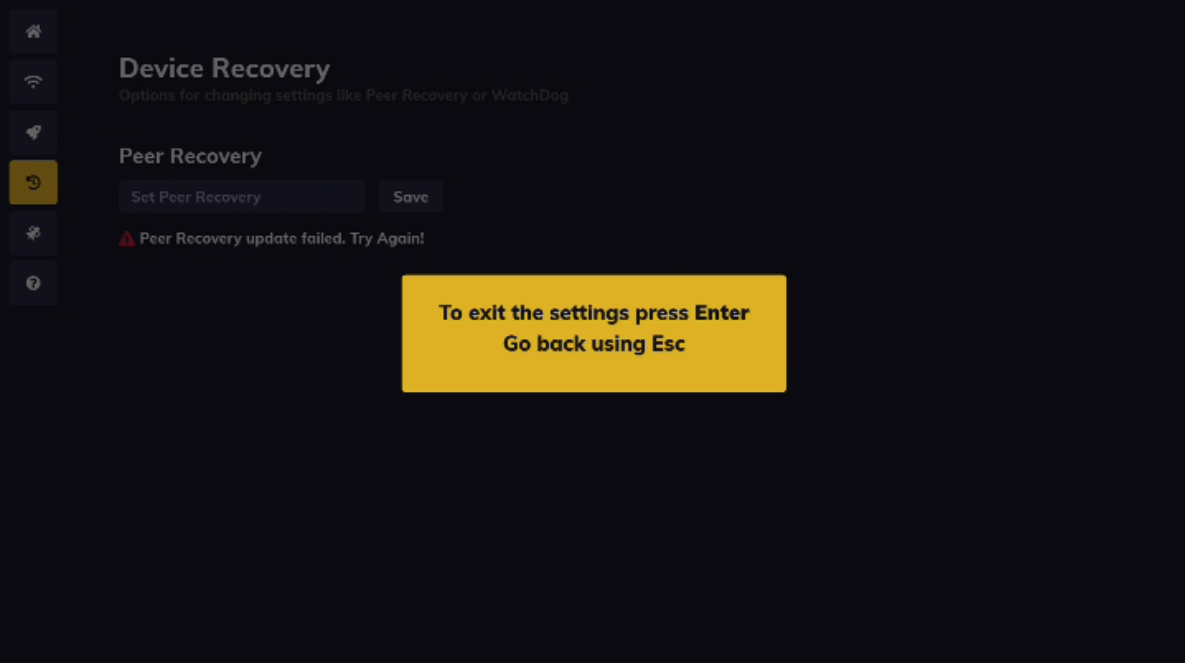
Navigate through the menu by using ARROW keys, and confirm the option by pressing ENTER, to exit the editing press ESC. Press TAB to confirm the entered or selected values.
OSD options
In OSD menu you can set various device settings, based on the device options including:
Network
- Here you can set up connection via Ethernet or Wi-Fi
- In order to access the Wi-Fi setup, the device must be disconnected from Ethernet
Note: Use the ARROWS to navigate across items. Press ENTER on the selected item to fill in the password. Press TAB to confirm the password and connect to Wi-Fi.
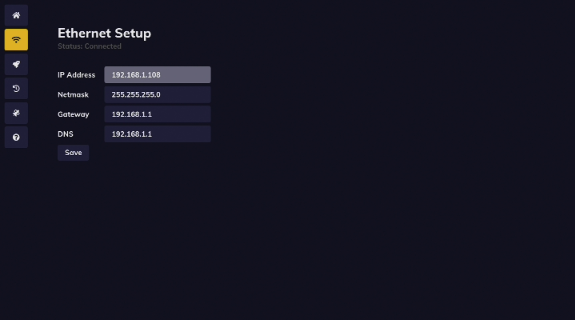
Ethernet Setup
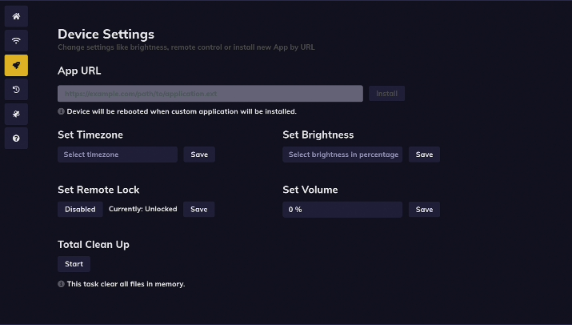
Device settings (unavailable on Raspberry Pi)
- Install new version of signageOS Core App with built-in Applet
- Set Timezone
- Set Brightness and Volume
- Set Remote Lock (Kiosk mode)
- Total Clean Up
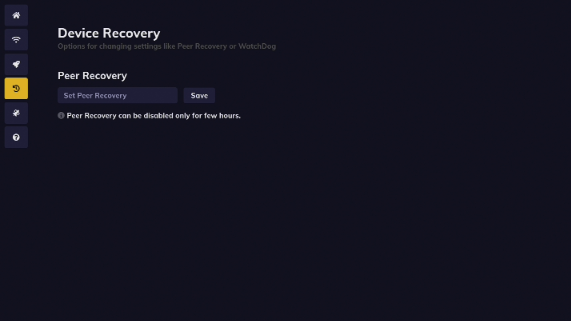
Device recovery (not supported on Raspberry Pi)
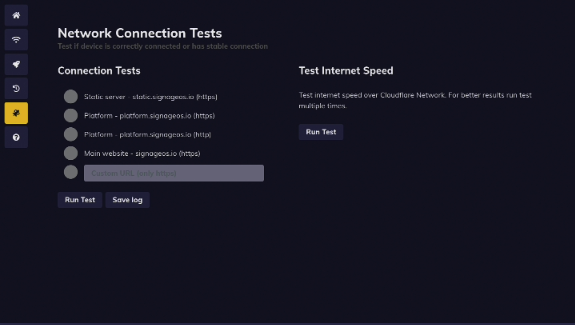
Network connection tests
- run the connection and speed test of the network
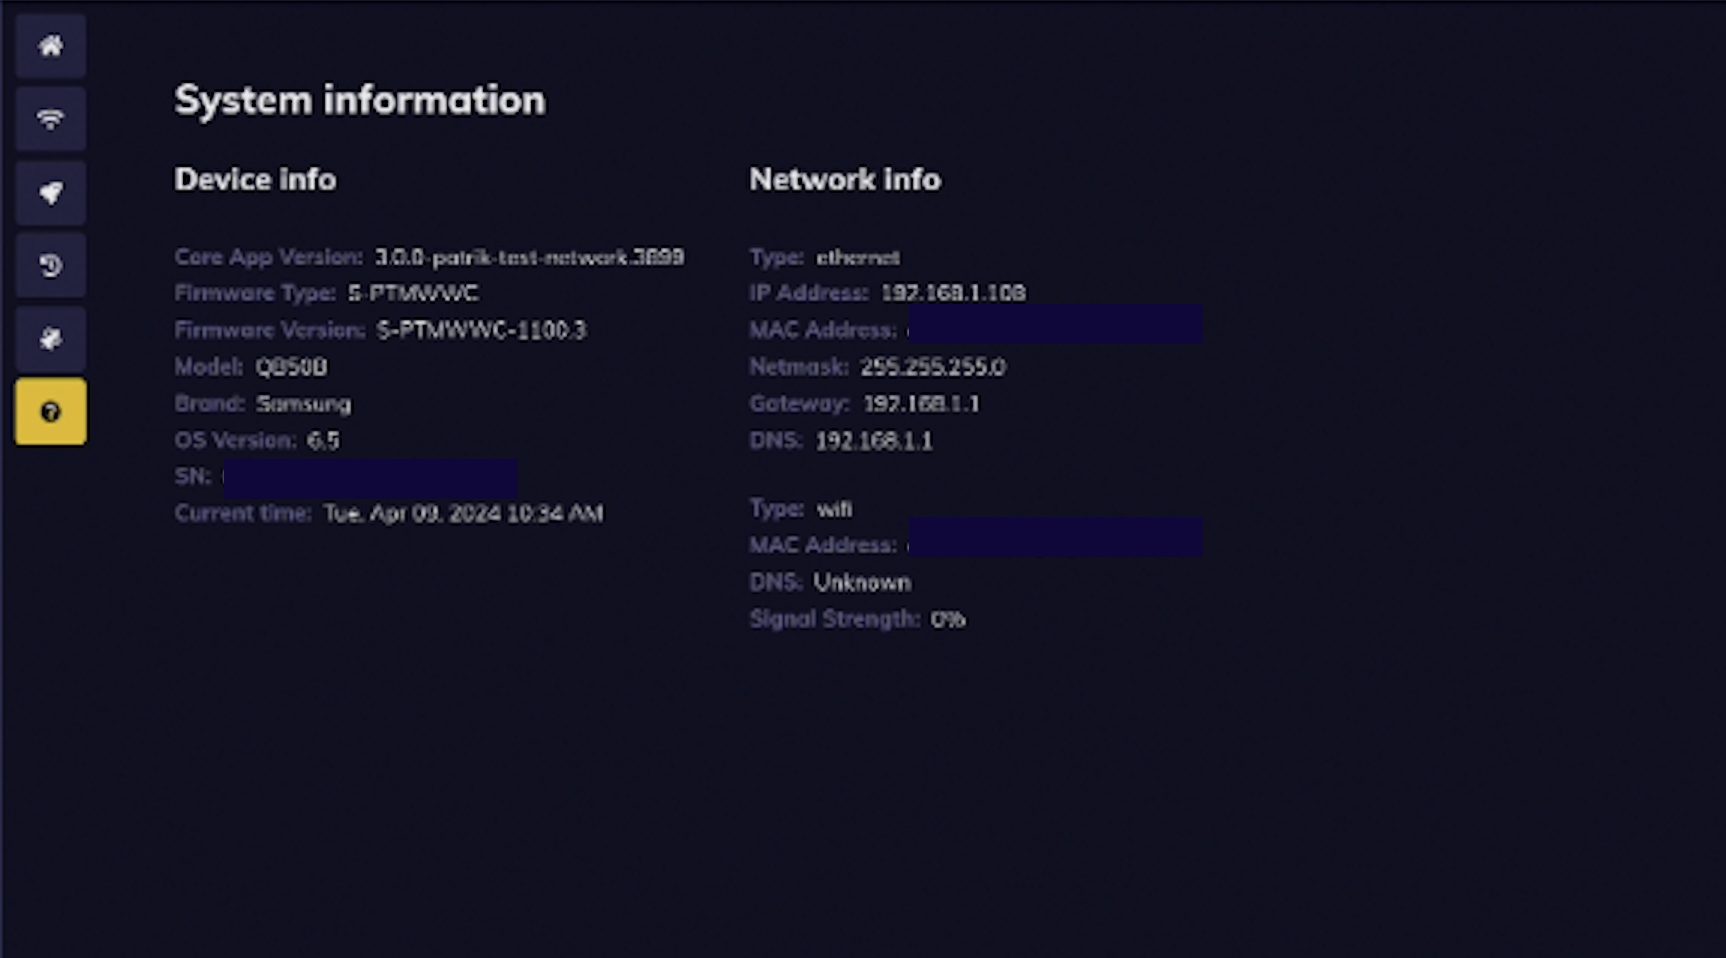
System information
Exit